How to Restore previous working state in Windows
How to Restore previous working state in Windows – Sometimes, a recently installed update, driver or application may be the cause of the computer’s slowness. In this case, you can use the system restore point to return to a previous good working condition, thereby quickly undoing changes to improve performance.
Restore previous working state in Windows
Okey! Follow the steps below to Restore previous working state in Windows:
- Open Start.
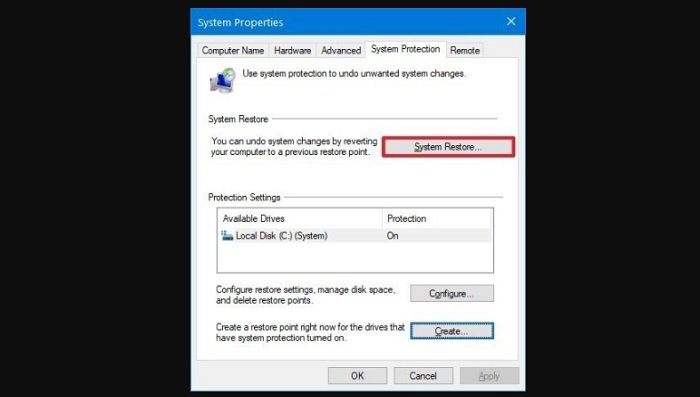
- Search for Create a restore point, and click the top result to open the System Properties app.
- Click the System Restore button.

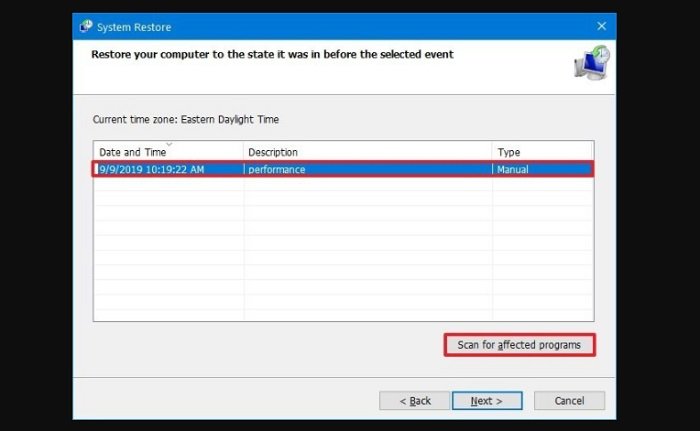
- Click the Next button.
- Select the most recent working to restore point that will help you to fix the current problem.
- Click the Scan for affected programs button to see the applications that will be removed if they’re installed after the restore point was created.

- Click the Close button.
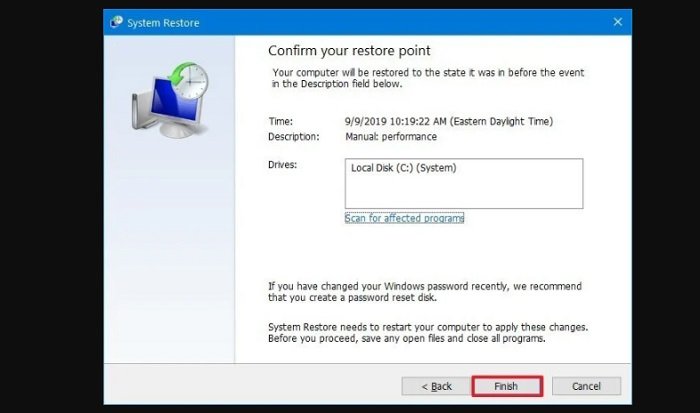
- Click the Next button.
- Click the Finish button.

After completing these steps, your computer will promptly return to its previous state of optimal performance.
Please note that using a restore point will not delete your files, but it will delete system changes, updates, drivers, and applications that were installed after the restore point was created.
By default, System Restore is disabled, so you must set it before you can restore system changes.
Hope to help you !
More: Your Services.msc is not opening? Please refer to the article on How to Fix “Services.msc Not Opening” in Windows 10.


