How to Disable Sleep Mode in Windows 10/11
Table of Contents
How to Disable Sleep Mode in Windows 10/11. When sleep mode is enabled on Windows, it automatically turns off the screen when you’re not using it, and you can start your computer by pressing the power button.
Disable Sleep Mode in Windows 10/11
Although this feature is quite useful, some users do not like it, and here is how you can disable sleep mode on Windows 10/11.
Using Settings
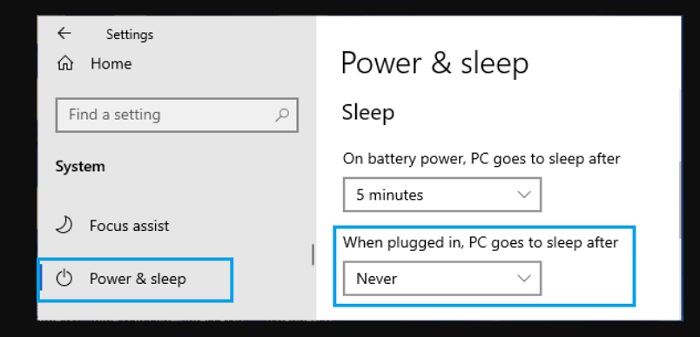
Go to Settings > System > select Power & Sleep in the left pane. In the right-pane, scroll down to the “Sleep” section and set the ‘When Plugged in’ setting to Never.

Note: To maximize battery life, set the “On Battery” sleep mode setting to the lowest possible value.
Using advanced power plan settings
Another way to change sleep mode settings on a Windows 10 computer is to use advanced power settings.
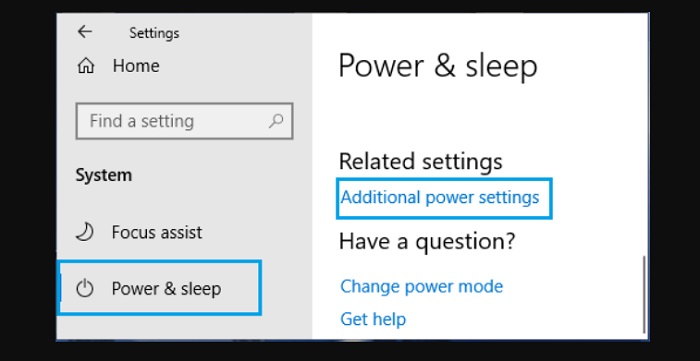
Go to Settings > System > select Power & Sleep in the left-pane. In the right-pane, scroll down and click on the Additional Power Settings Link.

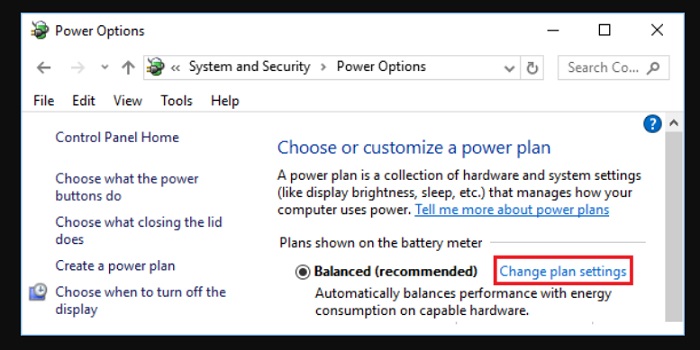
On the next screen, click on the Change Plan Settings link, located next to the current Power plan on your computer.

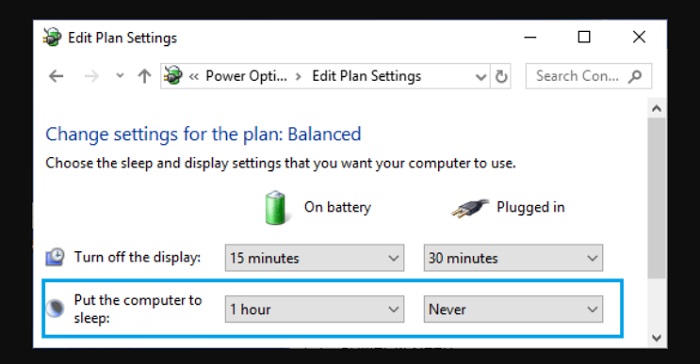
On the next screen, Disable Sleep Mode by setting ‘Put the computer to sleep’ setting to Never.

Note: To maximize battery life, set the “On Battery” sleep mode setting to the lowest possible value.
More: Fix Recycle Bin missing in Windows 11/10.


