How to Fix Windows 10 memory management blue screen error 0x0000001a
Table of Contents
Are you experiencing memory management errors after installing the latest Windows updates or hardware changes? On Windows computers, memory management is a feature that controls and manages the computer’s memory. It can allocate blocks to different applications or processes to optimize overall system performance. When a computer memory problem is detected, Windows 10 shuts down with a memory management blue screen.
Fix Windows 10 memory management blue screen error 0x0000001a
Windows 10 memory management errors can be caused by hardware failure, usually a corrupted memory bank. Likewise, error messages can also be triggered by installing incorrect drivers or existing drivers that need to be updated. If your Windows 10 computer is affected by the dreaded memory management blue screen, apply the solutions below to fix the problem.
Let’s start with the basics. If the memory management error is caused by a temporary glitch, a basic Windows restart may fix the problem.
Boot into safe mode
Start Windows 10 in safe mode (following steps below) and check if the issue is reproduced. If not, then probably third-party software or driver causing the issue:
Refer following steps to boot windows 10 in safe mode
- Click on the Power button on the login screen.
- Press and hold the SHIFT key on the keyboard and simultaneously click on Restart
- Once your PC restarts, on the Choose an option screen, tap or click Troubleshoot. If you don’t see the Startup Settings option, tap or click Advanced options.
- Tap or click Startup Settings then click Restart.
- On the Startup Settings screen, choose the startup setting for Safe Mode with Networking (Generally F5 key is pressed to select this setting).
- Sign in to your PC with a user account that has administrator rights.
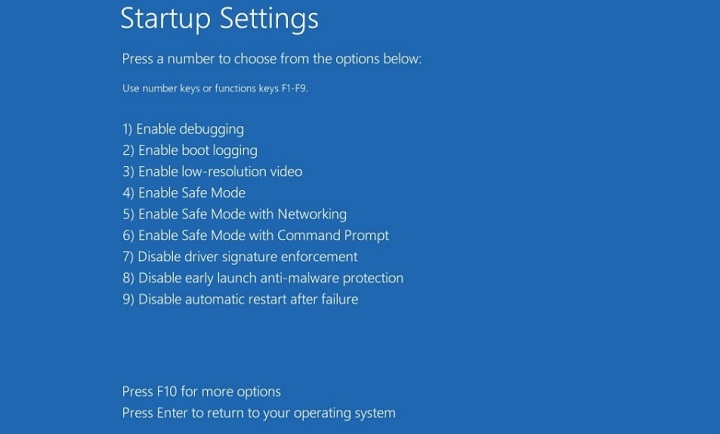
Check if the issue persists in Safe Mode.
If the issue does not reproduce in Safe Mode, then try to clean boot the system and check if the issue persists.
Run memory diagnose tool
As the name suggests, memory management error relates to the computer’s memory and that can be a physical problem with the RAM installed, too. Run the built-in Windows Memory Diagnostic Tool that detects and helps discover if this is the root of the problem.
- Press Windows key + R, type mdsched.exe, and click ok,
- This will open the Windows Memory Diagnostics tool,
- Click on Restart now and check for problems (recommended).
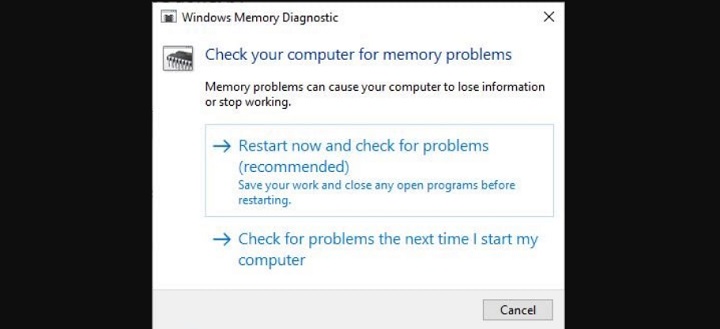
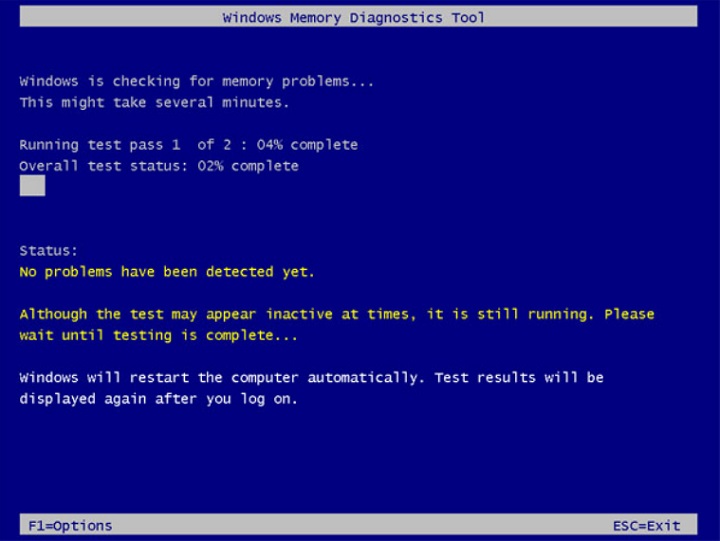
When Windows restarts, Let the tool run it will tell you if there is something wrong with your memory. If there is, then you’ll have to either replace the RAM yourself or send back your computer if it’s under warranty.
Run System file checker
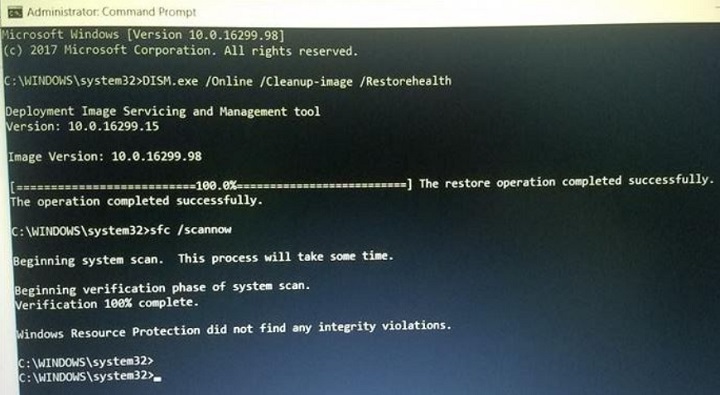
System file checker utility is a Microsoft tool for detecting various problems with your system, especially for corrupted system files, and running it seems to have solved some people’s memory management woes as well. Let’s run a System File Checker (SFC) scan to check for any system files corruption in the system. Before that run DISM (Deployment Image Servicing and Management) restore health command that ensures the system file checker works properly.
- On the Start menu search type cmd, right-click on the command prompt from search results, and select Run as administrator,
- In the Command Prompt, type
DISM /online /cleanup-image /restorehealthand then press the enter key, - Wait for the command to complete Once done type the system file checker command
sfc /scannowand press enter key, - And finally restart your PC once the scanning process completes 100%, Check if this helps fix the memory management blue screen error.
Reset Virtual Memory
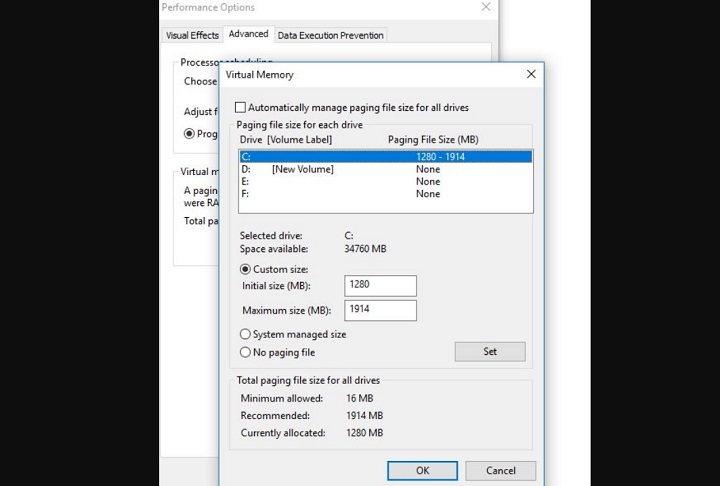
If you have recently tweaked virtual memory to add extra RAM, we recommend changing it to automatic and letting windows manage the page file itself.
- Press Windows key + R, type
sysdm.cpl, and click ok to access System Properties. - Here tap Advanced in the toolbar. Then click Settings under Performance.
- In the Performance Options window, tap Advanced in the toolbar. Then click on the Change option under Virtual memory.
- In the Virtual Memory window, check and make sure it’s set Automatically manage paging file size for all drives.
- If not checkmark Automatically manages paging file size for all drives.
- Need system restart to apply the changes, and check if this helps fix the blue screen error.
Install the latest Windows update
A Windows update can correct a variety of errors and can also increase the stability of your Windows 10 device. Installing the latest windows update may have the bug fix for this memory management error, let’s install the latest windows updates following the steps below.
- Press Windows key + I to open the Settings app,
- Click Update & Security then Check for updates.
- This will download and install the latest windows updates if available or pending installation,
- Once done restart your PC to apply them.
Update your graphics card drivers
Another most common cause of the memory management error in Windows 10 seems to be outdated or broken graphics card drivers. If you’re not running the latest version, try installing the newest available. If you are, it probably wouldn’t hurt to uninstall them and try again. The drivers you need will depend on your graphics card, of course. Windows 10 will be able to tell you what you have in your system, but it’s likely to be onboard Intel graphics or something from Nvidia or AMD.
Check software problems
Sometimes the BSOD problem can be because a software program that you installed in the near past may be interfering with the working of existing software. You can then disable the new software and try if the problem is solved.
Did these solutions help fix the memory management blue screen error in windows 10? Let us know in the comments below.
More: Do you know how to Unpin the tile group from the Start menu? If you do not know, please refer to the article Unpin the tile group from the Start menu in Windows 10!

