How to Enable ReadyBoost in Windows
How to Enable ReadyBoost in Windows – If your old device is still using a traditional spinning platter hard drive, you can enable ReadyBoost to improve the performance of your computer.
ReadyBoost is a feature that has been around for a long time. It uses removable drives (such as flash drives or SD cards) to cache files and improve overall performance without adding more memory.
Enable ReadyBoost in Windows
Important note: If you are using an SSD, you do not need to enable ReadyBoost because you will not see any benefits.
To enable ReadyBoost on Windows 10, connect a USB flash drive and follow these steps:
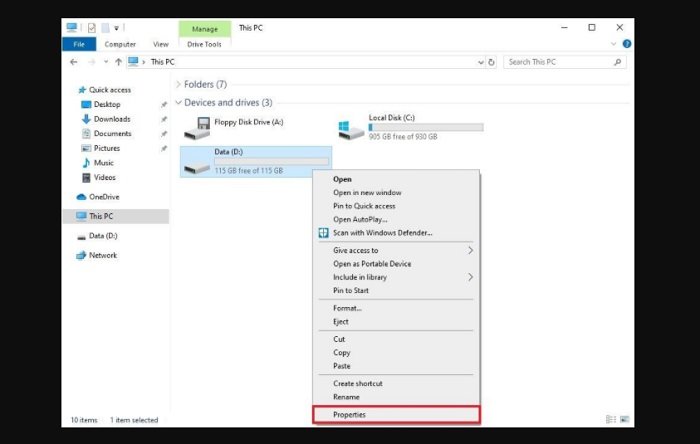
- Open File Explorer.
- Click on “This PC” from the left pane.
- Under the “Devices and drives” section, right-click the USB flash drive, and select the Properties options.

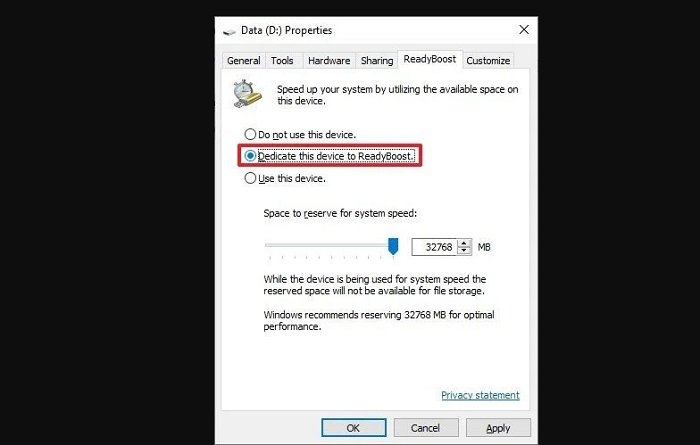
- Click on the ReadyBoost tab.
Quick tip: You can only use specific devices to enable the feature. If the drive can handle ReadyBoost, Windows 10 will let you know during setup.
- Select the Dedicate this device to ReadyBoost option.

- Click the Apply button.
- Click the OK button.
Once you complete the steps, the removable drive should boost the performance of your device.
Hope to help you !
More: Windows 10 Wi-fi icons have problems? refer to the article How to fix no Wi-Fi icon in Windows 10.


